Grilled chicken breast is a go-to for summertime grilling, all-year-round meal prep for salads or sandwiches, and even entertaining, as it’s always a crowd-pleaser. This is our family’s best grilled chicken recipe.
While it’s not a Chinese recipe, we take inspiration from Chinese cooking by adding one simple marinade ingredient we know everyone has—WATER!
Adding water to your marinade may seem counterintuitive, but this grilled chicken recipe will be the juiciest you’ve ever had. At a recent dinner party, our friends and family were raving about it.
Add the Juice Back to Your Chicken
In order for meat to become juicy—especially with drier, leaner, less flavorful cuts like chicken breast and pork loin—we sometimes need to add the “juice” into it.
It’s a principle that we use in our dumpling fillings to make a juicy, brothy first bite of your dumpling. It’s also something we do when velveting meat for stir-fries, and even for larger cuts, like my mom’s Shanghai Braised Pork Chops. We add water to the meat.
Adding a little bit of water to pork and chicken in particular during the velveting process makes for juicier, more tender meat.

So recently, when we were due to have friends over for a barbecue and my mom/Judy was tasked with marinating chicken breast for the grill, she added water, because that’s what she always does.
(See this technique also in her recipe for Super Easy (individually) Grilled Ribs, another summer grilling hit!)
She also decided to lightly pound the chicken using her go-to technique: using the back of a Chinese cleaver. This helps the water absorb into the meat and helps the chicken cook faster. She uses the same technique in that Shanghai Braised Pork Chops recipe I mentioned earlier.
Well lo and behold…that chicken grilled up beautiful and juicy! The juice was visible with every slice of chicken and every bite.
The juiciness, combined with the herby garlicky marinade and the smoky flavor from the grill had our guests asking for the recipe. And it had us running to share it with you all!


Video:
But Wait, Isn’t Air-chilled Chicken Better?
Have you ever heard that a lot of the weight you’re paying for at the grocery store when buying poultry is actually water?
Indeed, Thanksgiving turkeys are sometimes injected with water, salt, and spices. Most grocery store chicken is also water-chilled, which is a process of cooling the chicken down to a safe temperature by putting it in a cold water solution.
Said meat does absorb quite a lot of water, leading to the common complaint that one is buying more water than one bargained for in the price per pound of chicken.
Isn’t that why you might pay a little extra for the fancy air-chilled chicken at the grocery store? (Bell & Evans is the most notable brand.) And why would you want to add more water to your meat?
Why This Technique Works: An Aside from Sarah
Okay, so Kaitlin just brought up air-chilled chicken. I do prefer the texture of air-chilled chicken generally, so what gives with this technique?
The reason why adding water to meat marinades works in many Chinese applications is that usually, the meat is cut into much smaller pieces. In Chinese cooking, large pieces of meat aren’t as common.
Usually, you use small bite-size bone-in pieces or slices—or simply grind it. The water absorbs more readily into the meat because the muscle fibers in the meat are loosened and/or pulverized!
This is why, in a dumpling filling with ground meat for example, you can add up to a cup of water, depending on the amount of filling. Shocking, I know. (We actually talked about this in our episode of Family Dinner with Andrew Zimmern. I think Andrew was surprised at how juicy the dumplings were, with the simple addition of water!)
It also mostly stays in the meat because, according to this article by food experimenter/writer/cookbook author J. Kenji Lopez-Alt, when the muscle fibers in meat loosen, “they don’t contract as much when they cook, ensuring that more of that moisture stays in place.” He was talking about Thanksgiving turkeys, but hey, the same principle applies.
The salt in the marinade—from ingredients like soy sauce, oyster sauce, and Shaoxing wine—also loosens up the meat and helps it hold moisture. (In the case of the dumplings, there’s the added benefit of a dumpling wrapper to help catch any juice that does leak out, of course.)
Kenji mentions that meat absorbing water can cause the juices to taste “watery.” While in the case of Thanksgiving turkey, we agree brining is a hassle and a half—and not the best way to prepare it—we don’t think that the anti-water stance applies here. Kenji did test his hypotheses using chicken breast, but for whatever reason, the alchemy here seemed different.
A Note On Thanksgiving Turkey
On the topic of turkey, we have “dry-brined” our turkey long before we even knew what dry brining was!
To us, logic-slash-Yeye (our professional chef grandpa) simply dictated a long marinating time with liberal no-bland-foods-allowed levels of salting, what in modern day food nerd parlance has become “dry brining.”
Perhaps it’s my mom’s pounding technique or the speed at which the chicken cooks over high heat on the grill. (As opposed to a long roasting time and a very LARGE bird where flavor needs time to seep in and also has a long time to leach out during roasting. Kenji also roasted the chicken breasts during testing.)
You pound the chicken to an even thickness, so it cooks evenly and quickly. And my mom’s back of the knife technique ensures that those muscle fibers loosen up for the water and flavors in the marinade to penetrate.
We tested this recipe with both air chilled chicken as well as run of the mill grocery store chicken. This water marinating technique is worth doing in either case.

We may not be food scientists, but we are home cooks. Before we started The Woks of Life, I would ask my parents why they used a certain technique. They would say something like, “because it makes the meat juicier.” I would ask, “Why?” And they would go, “I don’t know. It just works.”
We have come a long way since then. But sometimes, it does feel oddly freeing to go back to the days of “it just works!” Because while we’re a family of food bloggers, at our core, we’re still just home cooks.
(And on the topic of summertime eats, in our brains we are filing this recipe in the same place as “ice cream is good for you,” a Harvard nutrition research finding whose explanation remains a mystery.)

What Cuts of Chicken Can I Use?
Okay, it’s Kaitlin again. Back to the recipe!
Grilling chicken breast is the best for this technique, as it has a tendency to dry out and be less forgiving if you leave it on the grill too long.
Split chicken breasts with the skin on and bones removed is another way to add flavor and moisture to your chicken, but it is not essential. You can also use boneless skinless chicken breast.

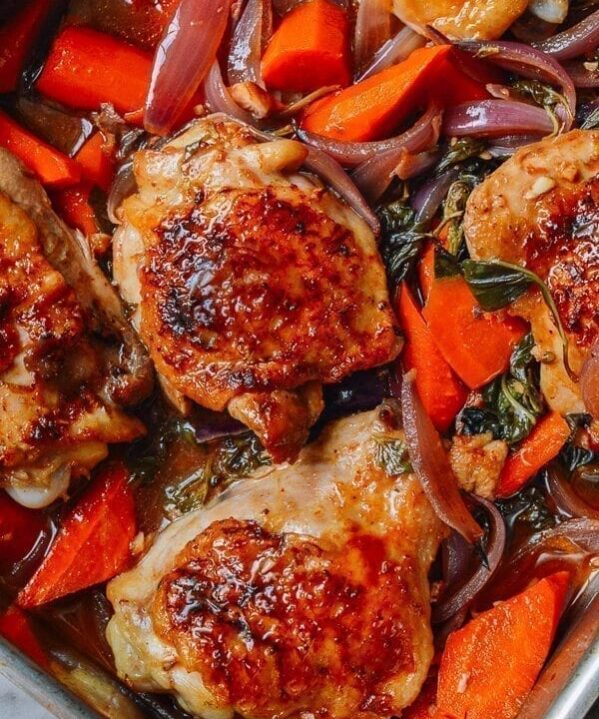
Chicken thighs don’t necessarily need this technique—they grill up juicy regardless due to more fat and dark meat. But you can add a bit of water to chicken thighs as well.
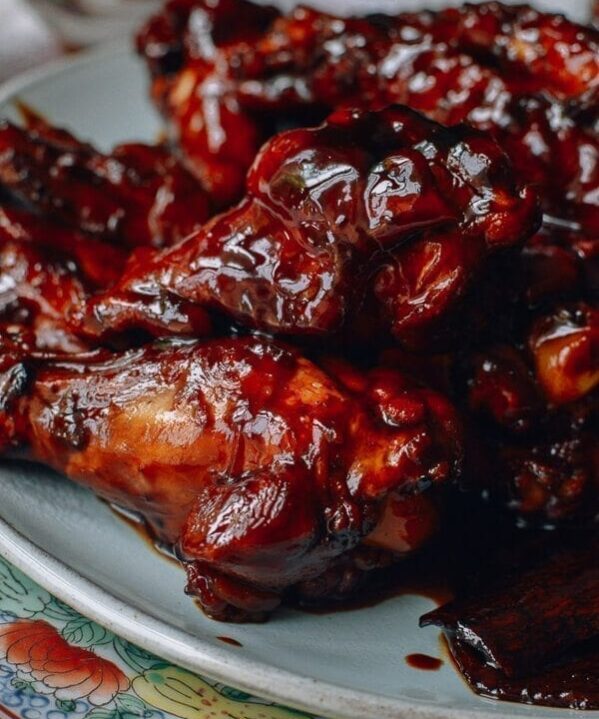
Even when my mom makes her Three Ingredient Salt & Pepper Chicken Wings, she adds some water to make sure the wings grill up plump and juicy.
Do I have to marinate the chicken overnight?
In short, overnight is ideal, but you could also get away with an AM marinating and a PM grilling.
Additional recipe credit!
The seasoning in the recipe is inspired by Once Upon a Chef’s recipe for grilled chicken with some updates like using fresh herbs, omitting the lemon zest—though that would also be delicious if you left it in—and the added water.
If you haven’t already, check out her excellent blog! Sarah swears by her Orecchiette with Sausage & Broccoli.
Grilled Chicken Recipe Instructions
Preparation:
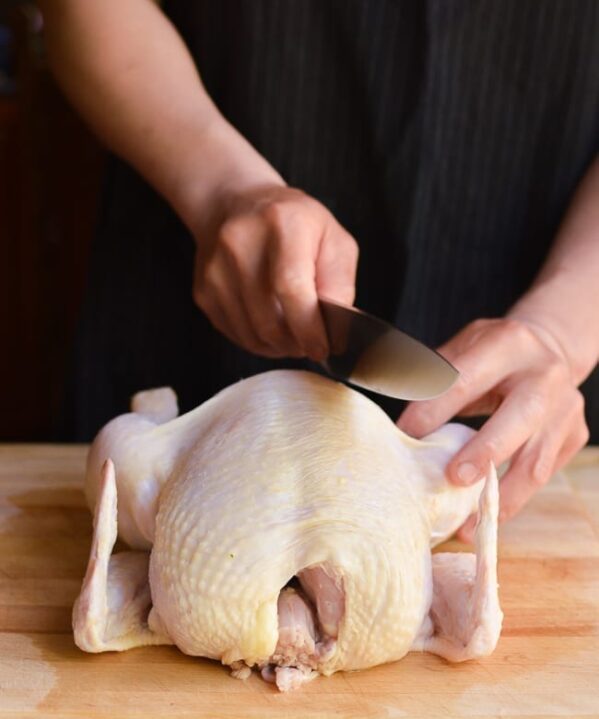
If you’re using bone-in split chicken breasts, de-bone them and leave the skin on (watch our video in this post to see how we did it!)


This extra step will give you the elusive boneless SKIN-ON chicken breast! Plus, split chicken breasts are often cheaper than boneless skinless.

Pound the chicken breast on both sides with the back of a Chinese cleaver/chef’s knife, rotating the chicken 90° to make a crosshatch pattern. (You could also use a meat mallet.) This process will loosen the meat texture so the marinade can better penetrate.


In a large bowl, mix the chicken breast with the water, a couple of tablespoons at a time, massaging it in with your hands until the chicken absorbs it. Keep adding it a couple tablespoons at a time until the chicken stops absorbing water. The process takes about 10 minutes.


To make the marinade, strip the tender thyme leaves off the woody stems and discard the stems. Do the same with the oregano. Finely chop the herbs. Next, mince the garlic.

Add the chopped herbs and garlic to the bowl with the chicken, along with the olive oil, salt, and pepper. Mix well, cover, and refrigerate overnight or at least 8 hours.


Cooking:
Take the chicken out 1 hour before grilling so it’s not stone cold when it hits the hot grill. Preheat your grill. You want to start with a brushed grate and a hot temperature (in the ballpark of 400-500°F/200-260°C).
If you’re using skin-on chicken, place the chicken skin side down. Use any remaining marinade to baste the chicken at the beginning of the grilling process.
You’ll also see in the photo below that the chicken breast tenders separated from the main pieces. That’s okay. Just grill them separately (they’ll take even less time, so if you’re the one sweating over the grill, consider them a chef’s treat!).

Rotate the chicken a half turn to get nice grill marks before flipping. The chicken should take about 6-8 minutes to cook depending on how hot your grill is (3-4 minutes per side). Try not to flip the chicken too many times during the grilling process.


We grilled ours on a gas grill, and it took closer to 8 minutes. If we were using very hot charcoal, it probably would be done in about 6 minutes. Thinner pieces will also cook faster.
No grill?
You can also cook this chicken by searing it in a frying pan!
When in doubt, use an instant read thermometer. We consider chicken to be done at around 160°F-ish. It will continue to come up to 165°F as it rests. Let the chicken rest under an overturned plate or foil for 5-10 minutes before serving!

This chicken is great on its own with some sides, or in sandwiches, on top of salads, or added to pastas, casseroles, and other dishes. Enjoy!


Grilled Chicken Breast

Ingredients
- 1 pound boneless chicken breasts (with or without skin)
- ⅓-½ cup water
- 1 tablespoon finely chopped fresh thyme
- 1 tablespoon finely chopped fresh oregano
- 1 tablespoon minced garlic
- 3 tablespoons extra virgin olive oil
- ¾ teaspoon salt (or to taste)
- ¼ teaspoon ground black pepper
Instructions
- Pound the chicken breast on both sides with the back of a Chinese cleaver/chef’s knife, rotating the chicken 90° to make a crosshatch pattern. (You could also use a meat mallet.) This process will loosen the meat texture so the marinade can better penetrate.
- In a large bowl, mix the chicken breast with the water, a couple of tablespoons at a time, massaging it in with your hands until the chicken absorbs it. Keep adding it a couple tablespoons at a time until the chicken stops absorbing water. The process takes about 10 minutes.
- To make the marinade, strip the tender thyme leaves off the woody stems and discard the stems. Do the same with the oregano. Finely chop the herbs. Next, mince the garlic.
- Add the chopped herbs and garlic to the bowl with the chicken, along with the olive oil, salt, and pepper. Mix well, cover, and refrigerate overnight or at least 8 hours.
- Take the chicken out 1 hour before grilling so it’s not stone cold when it hits the hot grill. Preheat your grill. You want to start with a brushed grate and a hot temperature (in the ballpark of 400-500°F/200-260°C).
- If you’re using skin-on chicken, place the chicken skin side down. Use any remaining marinade to baste the chicken at the beginning of the grilling process. Rotate the chicken a half turn to get nice grill marks before flipping. The chicken should take about 6-8 minutes to cook depending on how hot your grill is (3-4 minutes per side). Try not to flip the chicken too many times during the grilling process.
- We grilled ours on a gas grill, and it took closer to 8 minutes. If we were using very hot charcoal, it probably would be done in about 6 minutes. Thinner pieces will also cook faster. When in doubt, use an instant read thermometer. We consider chicken to be done at around 160°F-ish. It will continue to come up to 165°F as it rests. Let the chicken rest under an overturned plate or foil for 5-10 minutes before serving!